Plain-English guides from the crew. How to pick materials, what to expect on install day, and how to keep your floor looking good.
Years on the Job
Flooring Services
Project Estimates
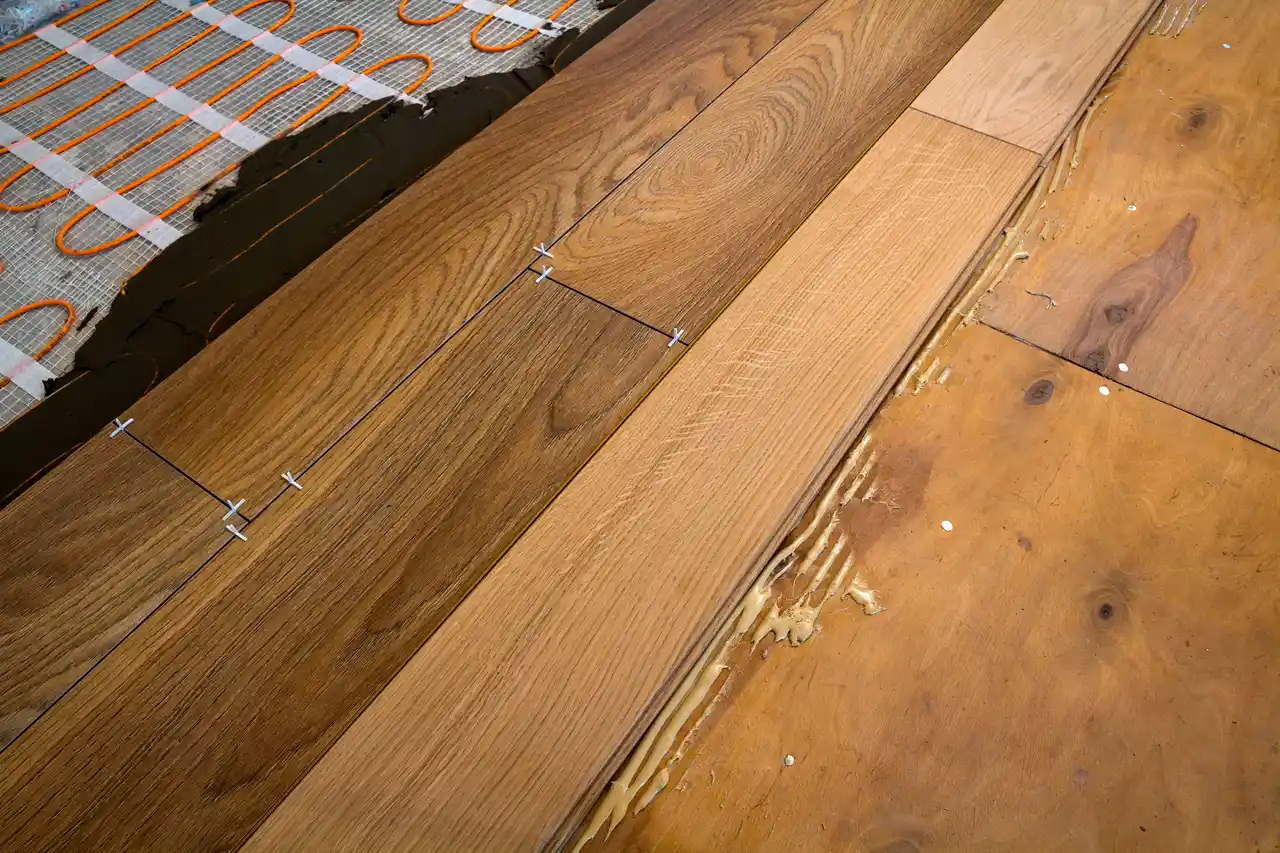
Hardwood floors buckling is one of the most expensive flooring problems Westchester homeowners face. The wood lifts away from the subfloor, creating raised sections that look bad and pose tripping hazards. The repair cost depends entirely on what caused the buckling in the first place. Understanding the cause helps homeowners decide between minor repairs and full floor replacement. Vargas Flooring sees hardwood buckling regularly in pre-war Scarsdale colonials, coastal Rye homes, and Bedford historic properties. Each case has different underlying problems. Moisture is the most common culprit but not the only one. Subfloor issues, improper installation, and acclimation failures all create buckling that looks identical on the surface but requires different solutions. This guide explains the actual causes, the diagnostic process, and what you should expect during repair work for hardwood floors buckling in your home.
Hardwood floors buckling almost always trace back to moisture exposure. The wood absorbs water from a leak, flood, high humidity, or moisture rising from a concrete slab below. As it absorbs water, the wood expands. With nowhere to expand horizontally because the planks are tight against each other, the boards push up vertically. The result is the raised, lifted sections that homeowners see. Common moisture sources include dishwasher leaks that ran undetected for weeks, refrigerator condensation pooling under appliances, basement humidity rising through concrete slabs, and shower or bathroom water damage in adjacent rooms. The damage often shows up far from the actual leak because water travels through subfloor cavities before saturating the hardwood above. Identifying the moisture source is the first step in any real repair.
Sometimes hardwood floors buckling happens without any obvious water source. The cause is usually subfloor failure rather than direct moisture. Plywood subfloors can delaminate over time, especially in older Westchester homes built before modern engineered substrates. The plies separate and create voids that allow the hardwood above to move. Original plank subfloors in pre-war Scarsdale and Bronxville homes flex more under foot traffic than modern subfloors tolerate. The flexing creates the gradual lifting that looks identical to moisture buckling. Joist problems below the subfloor also create the same surface symptoms. Sagging joists, sistered repairs that have failed, or framing damage from previous renovations all cause buckling that no surface repair can fix. The work has to address the actual cause.
Improperly installed hardwood floors sometimes buckle months or years after installation. The most common installation mistake is skipping acclimation. Hardwood needs five to ten days in the conditioned space at the home’s actual operating humidity before installation. Wood installed without proper acclimation moves significantly during the first seasonal cycle and often buckles when humidity rises in summer. Insufficient expansion gaps around the perimeter create another common failure. Hardwood needs space to expand seasonally. Without proper gaps, the wood has nowhere to go when it expands. The result is buckling that develops over the first year of use. Wrong fastening patterns, improper nailing schedules, or inadequate adhesive coverage all contribute to early buckling. These problems require partial or full reinstallation rather than spot repair.
Our diagnostic process starts with moisture testing throughout the affected area and adjacent rooms. We use calibrated moisture meters to identify the source of any water exposure. The data tells us whether the cause is active moisture or historical damage from a resolved leak. Next, we assess the subfloor through basement access or by removing affected hardwood sections. The subfloor condition determines whether repair work needs to address structural issues before any new flooring goes down. Finally, we evaluate the surrounding hardwood for damage extent. Sometimes only a small area needs replacement. Other times the entire room or adjacent rooms need attention because the moisture has affected more than initially visible. The honest assessment covers what your specific buckling situation actually requires for lasting repair.
(845) 332-1229
(845) 332-1229
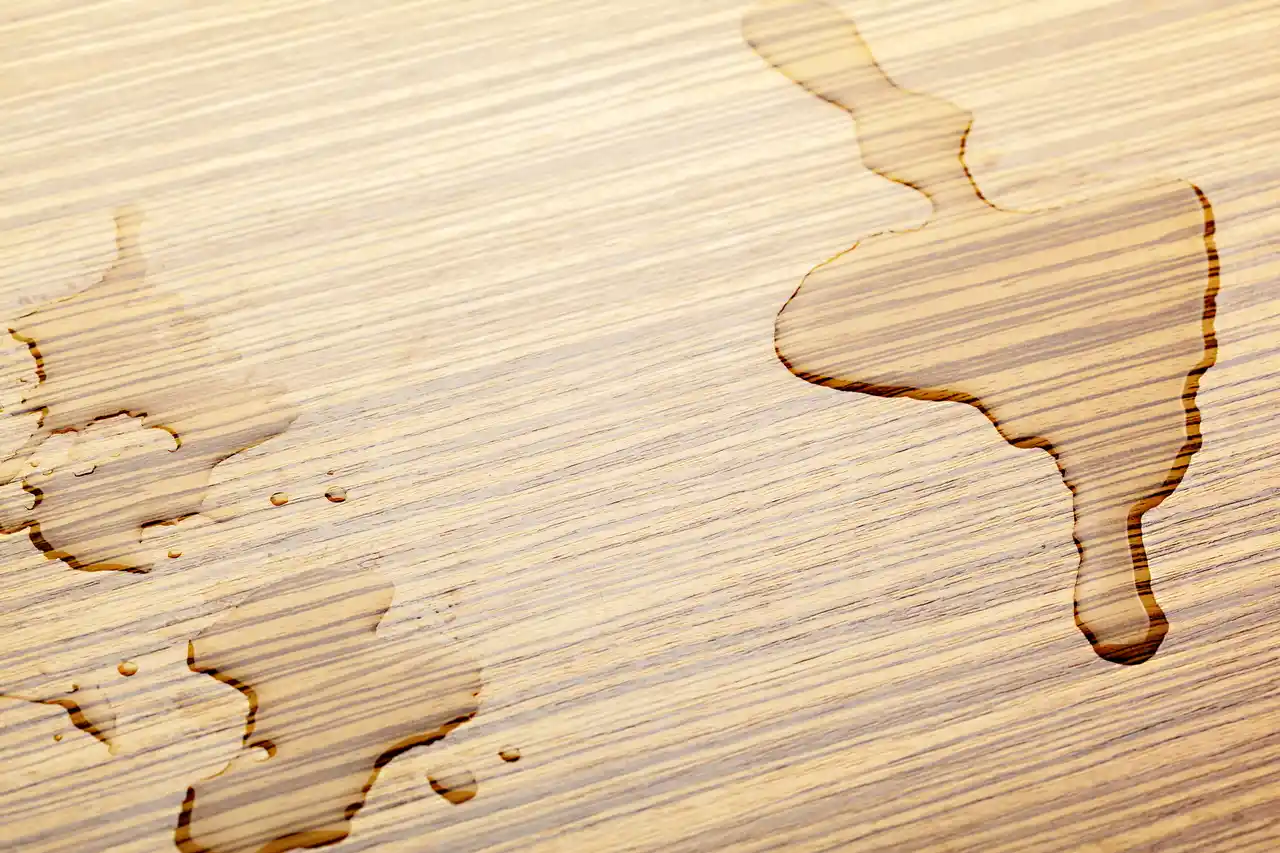
Water damaged floor situations require fast action. The first 48 hours after water exposure determine whether your flooring can be saved or needs full replacement. Westchester homeowners deal with this regularly from burst pipes during winter freezes, dishwasher leaks, refrigerator failures, basement flooding, and weather-related water intrusion. The wrong response makes the damage permanent. The right response can save thousands in replacement costs. Vargas Flooring sees water damaged floor situations across Scarsdale, Rye, Bronxville, Chappaqua, Bedford, and Armonk. Each material responds differently to water exposure. Hardwood, laminate, LVT, tile, and engineered products all have different recovery potential. This guide walks through the first response steps, the assessment process, and the realistic repair options for water damaged floor situations in your home. Acting quickly and correctly protects your investment and your home from further damage including mold and structural issues that develop when water sits.
Stop the water source first. Shut off the main water valve if the leak is plumbing. Move appliances away from the wet area if appliances are the source. Get furniture and possessions out of the affected zone. Documentation matters for insurance claims and for the repair process. Photograph everything with timestamps. Wide shots showing the full affected area. Close-ups showing damage detail. Photos of the water source itself. Keep all photos until the repair is complete. Remove standing water with wet vacuums, towels, or pumps depending on volume. The faster the water comes up, the less penetrates into the subfloor and surrounding materials. Open windows and run fans to start the drying process. Professional water damage restoration companies have equipment that exceeds what homeowners can do, but the first 24 hours can happen with basic tools while professional help arrives.
Different flooring materials respond to water exposure differently. Solid hardwood can sometimes be saved if dried quickly and the exposure was brief. Significant water exposure for 24+ hours usually means replacement is necessary. Engineered hardwood with veneer over plywood handles water slightly better than solid hardwood but rarely survives full exposure either. Laminate flooring almost always needs replacement after water damage because the fiberboard core swells and cannot be dried back to original dimensions. LVT planks themselves survive water exposure well because they don’t absorb water. The substrate underneath usually needs work, and the LVT may need to be lifted, the substrate dried, and the LVT reinstalled. Tile flooring survives water exposure well unless the substrate underneath has been compromised by extended exposure.
Water damaged floor situations almost always involve subfloor damage that the surface flooring hides. The surface material catches water first but moisture penetrates to the subfloor below. Plywood subfloors absorb water, swell, and lose structural integrity. OSB subfloors disintegrate when saturated. Original plank subfloors in older Westchester homes warp and crack when exposed to water. The subfloor damage often requires more work than the visible surface damage. Replacing flooring without addressing subfloor problems means the new floor fails within months. Vargas Flooring removes affected flooring to assess subfloor condition during every water damaged floor repair project. The honest assessment covers what the subfloor actually requires including potential structural work that the surface flooring would have hidden.
Insurance coverage for water damaged floor situations depends on your specific policy and the cause of the damage. Sudden events like burst pipes or appliance failures are often covered. Gradual leaks and humidity damage usually are not. Document everything with photos, timestamps, and written records of what happened. Get the insurance adjuster involved early if you plan to file a claim. Restoration companies typically handle the initial water extraction and drying. Flooring contractors handle the actual repair and replacement after the space dries. The two services overlap but require different expertise. Vargas Flooring coordinates with restoration companies and insurance adjusters when needed. The estimate covers the repair scope based on what the dried space actually requires after restoration work completes.
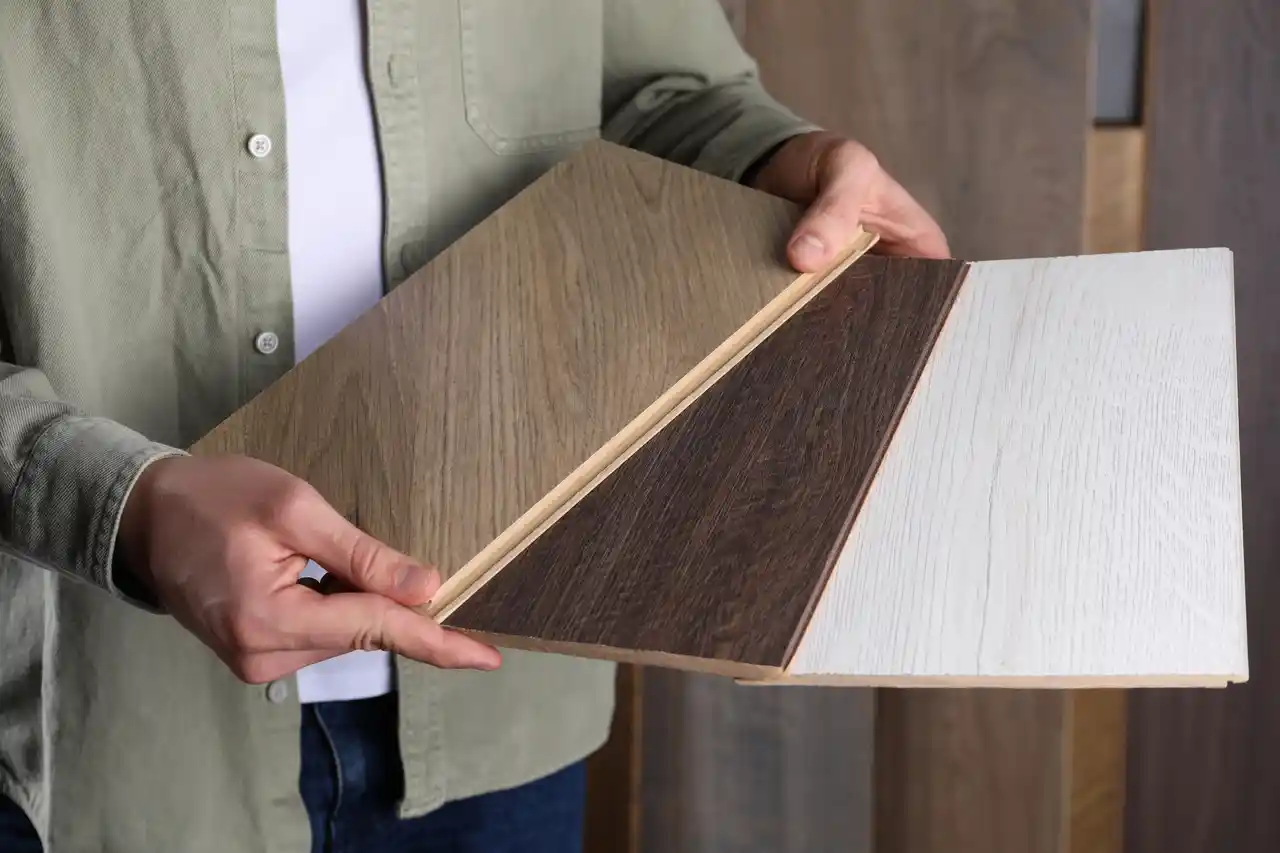
Hardwood vs LVT is the most common flooring question Westchester homeowners ask us. Both materials have legitimate use cases. Both have strengths and weaknesses. The right answer depends on your specific rooms, lifestyle, budget, and long-term goals for the home. Hardwood has been the premium flooring choice for generations, adding warmth and traditional appeal that nothing else matches. LVT has improved dramatically over the past decade, with realistic wood-look planks that handle conditions hardwood cannot. Vargas Flooring installs both materials throughout Scarsdale, Rye, Bronxville, Chappaqua, Bedford, and Armonk. We see the actual performance of each material across thousands of installations in real Westchester homes. This guide explains the practical differences between hardwood vs LVT, the cost realities, the durability comparison, and the resale value implications. The goal is to help you make an informed decision based on your specific home rather than generic advice that ignores your actual situation.
Hardwood vs LVT cost comparison favors LVT significantly upfront. Quality LVT installation runs about half the cost of mid-grade hardwood installation and a third the cost of premium wide-plank hardwood. The cost difference comes from both material and labor. LVT material is less expensive per square foot than solid or engineered hardwood. LVT installation runs faster because click-lock systems install without nailing, sanding, or finishing. Hardwood installation requires acclimation, careful nailing or gluing, and sometimes on-site sanding and finishing that adds days to the project timeline. Both materials last decades when installed correctly, so the long-term cost comparison gets more complex. Hardwood can be refinished multiple times over its life. LVT cannot be refinished but typically doesn’t need refinishing. The math depends on your specific situation and timeline.
Durability in the hardwood vs LVT comparison depends on what you mean by durability. Hardwood handles foot traffic well for decades but shows wear, scratches, dents, and water damage. The damage accumulates visibly over time. Refinishing every 10 to 15 years restores the appearance. LVT handles foot traffic, pets, kids, spills, and moisture better than hardwood without showing wear as quickly. Through-body color construction means scratches and chips don’t show contrasting color underneath. Waterproof construction means moisture exposure doesn’t damage the planks. The trade-off is that damaged LVT cannot be refinished. Significant damage requires plank replacement instead of refinishing the whole floor. For active families with pets and kids, LVT often outperforms hardwood in real daily use even though hardwood has higher perceived value.
Hardwood still commands premium perception in the Westchester real estate market. Buyers expect hardwood in Scarsdale colonials, Bedford estate homes, and Bronxville pre-war condos. LVT has improved visually to the point that most people cannot distinguish quality wood-look LVT from real hardwood in residential applications. Real estate appraisers and buyers can usually tell. Hardwood floors add measurable resale value in Westchester homes, especially in pre-war and estate properties where hardwood is part of the home’s character. LVT works well in kitchens, basements, mudrooms, and high-moisture spaces where hardwood doesn’t make practical sense. The strongest approach for many Westchester homes combines hardwood in main living areas with LVT in specific rooms where the conditions favor LVT performance over hardwood aesthetic appeal.
Our recommendations vary by room based on actual conditions and use patterns. Main living areas, dining rooms, and bedrooms typically benefit from hardwood for both performance and resale value. Kitchens depend on lifestyle. Active families with kids and pets often choose LVT for moisture and wear performance. Traditional kitchens in formal homes often choose hardwood for visual continuity with adjacent rooms. Bathrooms work best with tile or LVT, never hardwood except in powder rooms without shower exposure. Basements work best with LVT because of slab moisture that destroys hardwood. Mudrooms work best with LVT or tile for moisture resistance. The honest answer for hardwood vs LVT is that both materials have their place in most Westchester homes, and the right choice for each room depends on the specific conditions and use patterns of that room.
(845) 332-1229
(845) 332-1229
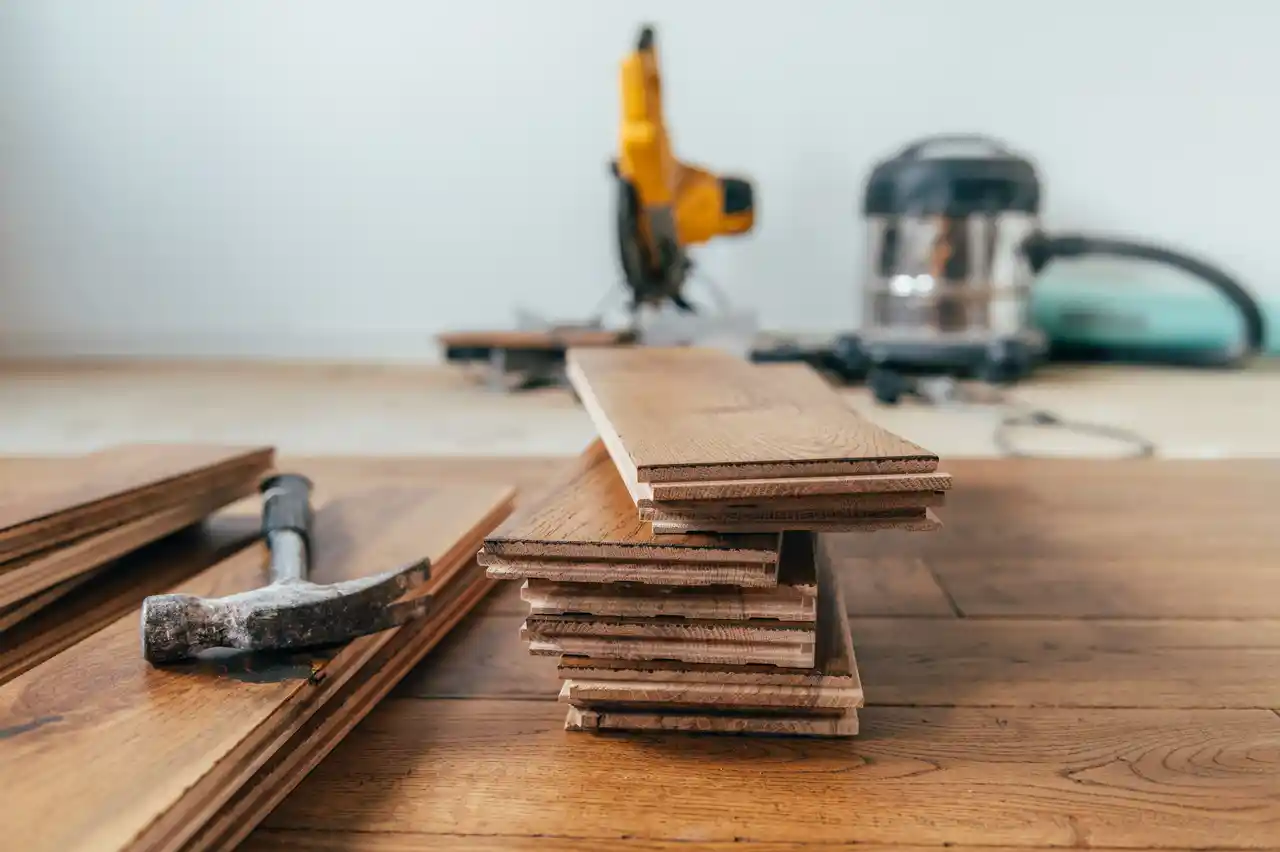
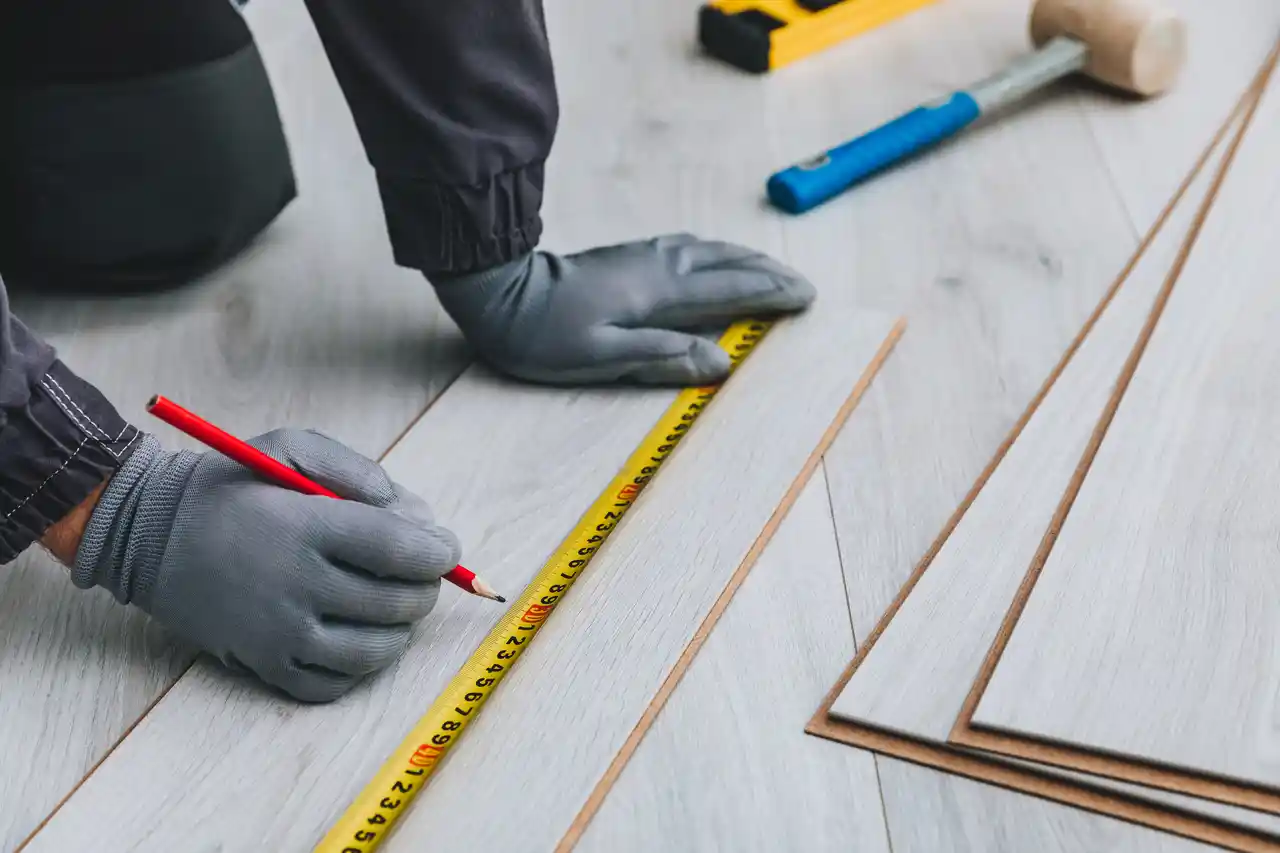
How long does flooring installation take is one of the first questions Westchester homeowners ask before starting a project. The answer depends on the flooring material, the size of the space, the substrate condition, and several other factors that affect the timeline. Generic answers like “a few days” don’t help with actual planning. Real timelines vary from one day for small LVT installs to three weeks for full custom hardwood projects with sanding and finishing. Vargas Flooring schedules flooring installation projects throughout Scarsdale, Rye, Bronxville, Chappaqua, Bedford, and Armonk every week. We have real data on how long each type of installation actually takes from the diagnostic visit through final cleanup. This guide explains the realistic timelines for each common flooring type, the factors that extend or shorten the schedule, and the timeline impact of substrate preparation, acclimation, and finishing work that affects how long does flooring installation take in your specific situation.
Hardwood installation runs longer than any other common flooring material. Acclimation takes five to ten days minimum before installation begins. The wood has to sit in the conditioned space matching the home’s actual operating humidity. Skipping acclimation creates the seasonal movement that causes gaps and buckling later. Installation itself takes one to three days per room for nailing, gluing, or floating systems depending on the product. Pre-finished hardwood is ready immediately after installation. Site-finished hardwood requires sanding and three coats of finish, which adds three to five days for the finish to cure between coats. The total timeline for a typical hardwood project runs two to three weeks from delivery to walkable floor. Premium projects with custom inlays or wide-plank exotics can run four to six weeks total.
Tile installation timelines depend heavily on substrate condition. Standard tile installation runs three to five days for typical residential rooms. Day one includes demolition and substrate prep. Day two handles waterproofing in bathrooms and substrate leveling where needed. Days three through four cover tile setting with thinset. Day five handles grouting and cleanup. Larger spaces or complex patterns extend the schedule. Substrate problems add significant time. Pre-war Westchester homes often need plywood overlay, cement board installation, or self-leveling compound before tile setting can begin. The substrate work adds one to three days to the project. Cure times also affect the schedule. Thinset needs 24 hours to cure before grouting. Grout needs additional time before the room can be used. The total walkable timeline runs five to seven days for most residential tile installations.
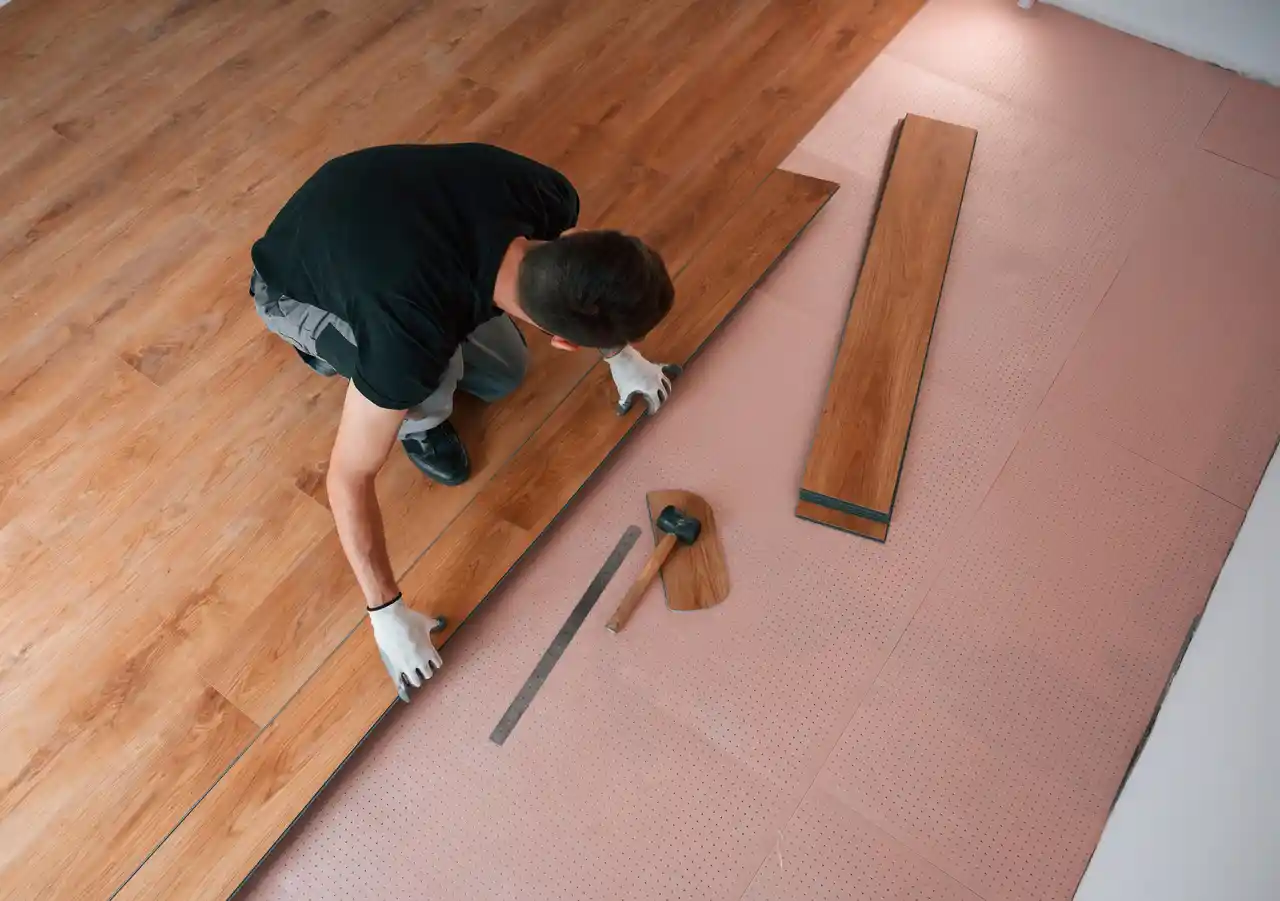
LVT installation runs faster than any other flooring type. Click-lock floating systems install in one to two days for typical residential rooms because no adhesive, sanding, or finishing is needed. The floor is walkable immediately after installation. Glue-down LVT adds a day for adhesive cure before heavy use. Laminate installation runs similarly fast at one to two days for typical rooms. The click-lock floating system means immediate use. Engineered hardwood floating installations run two to three days because the planks are heavier and connections take longer. Engineered hardwood with glue-down or staple-down installation runs three to four days. Acclimation still applies for all wood-based products including engineered hardwood and laminate. Skipping acclimation causes the same seasonal movement problems that affect solid hardwood. The acclimation time should be planned even though the installation itself runs faster.
Several factors extend how long does flooring installation take beyond the standard timelines for each material. Substrate problems are the most common. Pre-war Scarsdale subfloors, settled basement slabs, and water-damaged areas all need correction work before new flooring goes down. The substrate work adds days to the project. Acclimation requirements vary by product but typically add five to ten days of dry time before installation can begin. Demolition and removal of existing flooring adds time, especially when asbestos abatement is required in pre-war buildings. Custom features like inlays, borders, medallions, or pattern matching across large open spaces extend the timeline significantly. Multi-room projects run longer than single-room work because of staging and coordination. Stairs add a full day or two beyond the main flooring installation. The honest answer to how long does flooring installation take includes these realities rather than just the basic installation time.
LVT vs laminate is the second most common flooring question Westchester homeowners ask after hardwood vs LVT. Both materials look similar at first glance. Both install with click-lock systems. Both deliver wood-look or stone-look visuals at budget-friendly pricing compared to hardwood or natural stone. The actual performance differences matter significantly over the life of the floor. Water resistance, durability, comfort underfoot, and acoustic performance all favor one material or the other depending on the specific room conditions. Vargas Flooring installs both LVT and laminate throughout Scarsdale, Rye, Bronxville, Chappaqua, Bedford, and Armonk. We see the actual long-term performance of each material in real Westchester homes. This guide explains the LVT vs laminate comparison honestly, the room-by-room recommendations, the cost realities for each option, and the situations where one material clearly outperforms the other. The right choice depends on your specific use case rather than generic recommendations.
Water resistance is the most important practical difference in the LVT vs laminate comparison. LVT is waterproof. The planks themselves don’t absorb water. Spills sit on the surface without damage. Significant water exposure from leaks or floods doesn’t destroy the LVT, though the substrate underneath may need attention. Laminate is the opposite. The fiberboard core absorbs water and swells when exposed. Even modern water-resistant laminate has limits that LVT exceeds significantly. Standard laminate fails within hours of significant water exposure. Waterproof laminate with sealed cores handles more exposure than older generations but still doesn’t match LVT performance over time. For kitchens, bathrooms, mudrooms, basements, and any space with moisture potential, LVT is the clear winner. For bedrooms, hallways, and dry spaces, the water resistance difference matters less.
Durability in LVT vs laminate splits between scratch resistance and dent resistance. Laminate has harder surfaces that resist scratches better than most LVT. AC4 and AC5 laminate ratings indicate commercial-level surface hardness that handles rolling chairs, furniture, and pet claws well. LVT has slightly softer surfaces but the through-body color construction in quality products means scratches don’t show contrasting color underneath. LVT also handles denting better than laminate. Heavy furniture impacts dent laminate fiberboard cores significantly. LVT recovers from minor impacts because of the more flexible construction. Real-world durability depends on which type of damage your floor is most likely to see. Active homes with kids and pets often see more impact and water exposure than scratching, which favors LVT. Home offices with rolling chairs see more surface wear, which favors AC5 laminate.
Comfort underfoot favors LVT slightly over laminate. LVT planks have more flexibility than rigid laminate, which feels softer underfoot during long standing or walking sessions. The difference is subtle but noticeable in kitchens or workspaces where people stand for hours. Acoustic performance also favors LVT. Quality LVT with attached underlayment provides better sound dampening than laminate, which can sound hollow underfoot without high-quality separate underlayment. Visual quality has become similar in modern products. Both LVT and laminate offer realistic wood and stone visuals with embossed surfaces, beveled edges, and through-body color in premium products. The differences between premium LVT and premium laminate visuals are smaller than the differences between budget and premium products within either category. Quality matters more than the material choice for visual appeal.
Cost comparison in LVT vs laminate runs close between mid-grade products. Premium LVT costs slightly more than premium laminate. Budget LVT costs slightly less than budget laminate. The cost difference rarely justifies the material choice on its own. Long-term value calculations favor LVT because of water resistance. Laminate damaged by water requires full replacement of affected areas. LVT damaged by water often involves lifting the planks, drying the substrate, and reinstalling the same planks. The repair cost difference adds up over years of normal Westchester home life. Resale value treats both materials similarly because buyers see them as comparable budget alternatives to hardwood. Neither material adds significant appraisal value compared to hardwood or natural stone but both are accepted in appropriate rooms by current Westchester buyers.
(845) 332-1229
(845) 332-1229
Engineered vs solid hardwood is the decision homeowners face after choosing hardwood over LVT or laminate. Both materials look identical once installed. The construction underneath the surface differs significantly and affects where each material works, how long each lasts, and what each costs over time. Solid hardwood has been the premium choice for centuries. Engineered hardwood has improved dramatically in recent decades and now outperforms solid wood in specific applications. Vargas Flooring installs both engineered and solid hardwood throughout Scarsdale, Rye, Bronxville, Chappaqua, Bedford, and Armonk. We see actual performance differences in real Westchester homes including pre-war colonials, coastal properties, modern estates, and condos. This guide explains the engineered vs solid hardwood comparison honestly, the construction differences that matter, the room-by-room recommendations, and the long-term cost analysis that affects the right choice for your specific situation. The decision is more nuanced than catalog descriptions suggest.
Solid hardwood is exactly what it sounds like. Each plank is one solid piece of wood throughout, typically three-quarter inch thick with tongue-and-groove edges. Engineered hardwood uses a top wear layer of real hardwood over multiple plies of plywood or HDF substrate. The wear layer thickness varies from one millimeter in budget products to six millimeters or more in premium engineered. The cross-grain construction of engineered hardwood handles humidity changes better than solid wood. Solid wood expands and contracts seasonally as a single piece. Engineered wood’s layered construction limits seasonal movement to nearly zero. This difference matters significantly for installations over concrete slabs, in basements, near radiant heat systems, or in homes with extreme seasonal humidity swings. The construction differences drive most of the engineered vs solid hardwood performance differences.
Solid hardwood performs best in traditional installations over plywood subfloors in upper-level rooms. Living rooms, dining rooms, bedrooms, and hallways in Westchester homes with stable indoor conditions all work well for solid hardwood. The material handles decades of use and can be refinished multiple times. Engineered hardwood performs best in conditions that challenge solid wood. Concrete slab installations including basements and slab-on-grade homes work with engineered hardwood but fail with solid wood. Radiant heat systems work with engineered hardwood at appropriate temperatures but warp solid wood significantly. Coastal Rye homes with high year-round humidity see better long-term performance from engineered wood. Wide-plank installations over five inches benefit from engineered construction because wide solid planks move more with seasonal changes. The room and conditions drive the right choice.
Refinishing potential favors solid hardwood significantly in the engineered vs solid hardwood comparison. Solid wood can be sanded and refinished six to ten times over its life depending on plank thickness and previous refinishing work. Each refinishing removes one to two millimeters of wear surface. The hundred-year lifespan of well-maintained solid hardwood in pre-war Westchester homes proves the longevity advantage. Engineered hardwood refinishing depends entirely on the wear layer thickness. Budget engineered with one to two millimeter wear layers cannot be refinished at all. Premium engineered with four to six millimeter wear layers can be refinished one to three times. The total lifespan of engineered hardwood runs 30 to 60 years compared to 80 to 100+ years for solid hardwood. For multigenerational homes, solid wood usually makes more sense. For typical residential timelines, engineered hardwood lasts long enough that the difference rarely matters in practice.
Cost comparison in engineered vs solid hardwood runs slightly in favor of engineered for material cost and significantly in favor of engineered for installation cost. Solid wood installation requires nail-down or glue-down methods that take longer than the click-lock or staple-down systems used for most engineered products. The total project cost for engineered runs 10 to 20 percent less than solid hardwood for similar species and finishes. Real-world decision factors often override pure cost or longevity calculations. Concrete slab homes have no choice except engineered. Radiant heat systems demand engineered. Coastal humidity favors engineered. Pre-war upper-floor installations in Bronxville and Scarsdale often work better with solid hardwood for both performance and authenticity. Modern construction with engineered subfloors handles both materials equally. The right choice for your specific Westchester home depends on these conditions rather than generic recommendations.
Tile vs LVT bathroom flooring is one of the most consequential decisions in any bathroom renovation. Both materials handle moisture better than hardwood or laminate. Both have legitimate applications in residential bathrooms. The differences between tile vs LVT bathroom installations affect comfort, maintenance, cost, durability, and resale value over decades of use. Tile has been the standard bathroom flooring for centuries. LVT has emerged as a practical alternative that handles moisture as well as tile while delivering different benefits including comfort underfoot and faster installation. Vargas Flooring installs both tile and LVT in bathrooms throughout Scarsdale, Rye, Bronxville, Chappaqua, Bedford, and Armonk. We see actual long-term performance and homeowner satisfaction with each choice in real Westchester bathrooms. This guide explains the tile vs LVT bathroom comparison honestly, the waterproofing realities, the maintenance differences, and the real cost analysis that drives the right choice for your specific bathroom situation.
Waterproofing is the foundation of any tile vs LVT bathroom comparison. Both materials handle water but in different ways. Porcelain tile is impervious by nature. Water doesn’t penetrate the tile itself. The waterproofing depends on what happens at the grout joints and around the perimeter. Grout absorbs moisture without proper sealing. Cracks in grout joints allow water through to the substrate below. Properly sealed and maintained grout handles bathroom moisture for decades. LVT is waterproof through the entire plank. No grout joints to maintain. No sealing schedule. The planks themselves don’t absorb water. The waterproofing for LVT depends on the seams between planks and the perimeter sealing. Quality installations seal these properly. Both materials work for waterproofing when installed correctly. Both fail when shortcuts happen during installation.
Comfort differences between tile vs LVT bathroom installations are immediate and significant. Tile stays cold underfoot year-round without radiant heat. The hardness of tile means standing for any extended time becomes uncomfortable on bare feet. LVT stays warmer than tile because the construction includes some thermal insulation. LVT also feels slightly softer underfoot than rigid tile. The comfort difference matters most in master bathrooms where people stand at sinks for daily routines and walk around barefoot regularly. Tile works better with radiant heat systems that warm the floor through the substrate. Without radiant heat, tile bathrooms feel cold during fall and winter months. LVT works at room temperature without supplemental heating. The right choice depends on whether you plan to install radiant heat and how much you prioritize bathroom comfort during cold Westchester winters.
Maintenance requirements separate tile vs LVT bathroom installations significantly. Tile bathrooms require regular grout sealing every three to seven years depending on use and product. Without sealing, grout absorbs moisture and stains. Grout discoloration happens faster in bathrooms than other rooms because of the constant moisture exposure. Some homeowners regrout bathrooms every 10 to 15 years to refresh the appearance. LVT bathrooms have no grout to maintain. The planks don’t absorb moisture and don’t stain from typical bathroom use. Cleaning happens with standard floor cleaners without special grout brushes or sealers. The maintenance cost over decades favors LVT significantly when you add up grout sealing labor, regrouting projects, and cleaning time. For homeowners who want low-maintenance bathrooms, LVT delivers better long-term performance. For homeowners who don’t mind the maintenance schedule, tile delivers the traditional look without the upkeep being a deal-breaker.
Cost comparison in tile vs LVT bathroom projects runs in favor of LVT for most installations. Tile installation costs more per square foot than LVT because of the labor-intensive setting, grouting, and curing process. Substrate preparation costs more for tile because the tile cannot tolerate substrate flex that LVT handles. Total project costs for tile bathrooms run 30 to 60 percent more than equivalent LVT installations. Resale value implications favor tile in traditional Westchester bathrooms, especially in pre-war Scarsdale colonials and Bedford estate homes where tile is expected. LVT works for resale in casual bathrooms, basement bathrooms, and bathrooms where the buyer pool expects practical materials over traditional aesthetics. The right choice depends on your home’s character and the bathroom’s role within the home. Master and family bathrooms in traditional homes usually justify tile cost. Half baths, basement bathrooms, and bathrooms in modern homes often work better with LVT.

(845) 332-1229
(845) 332-1229
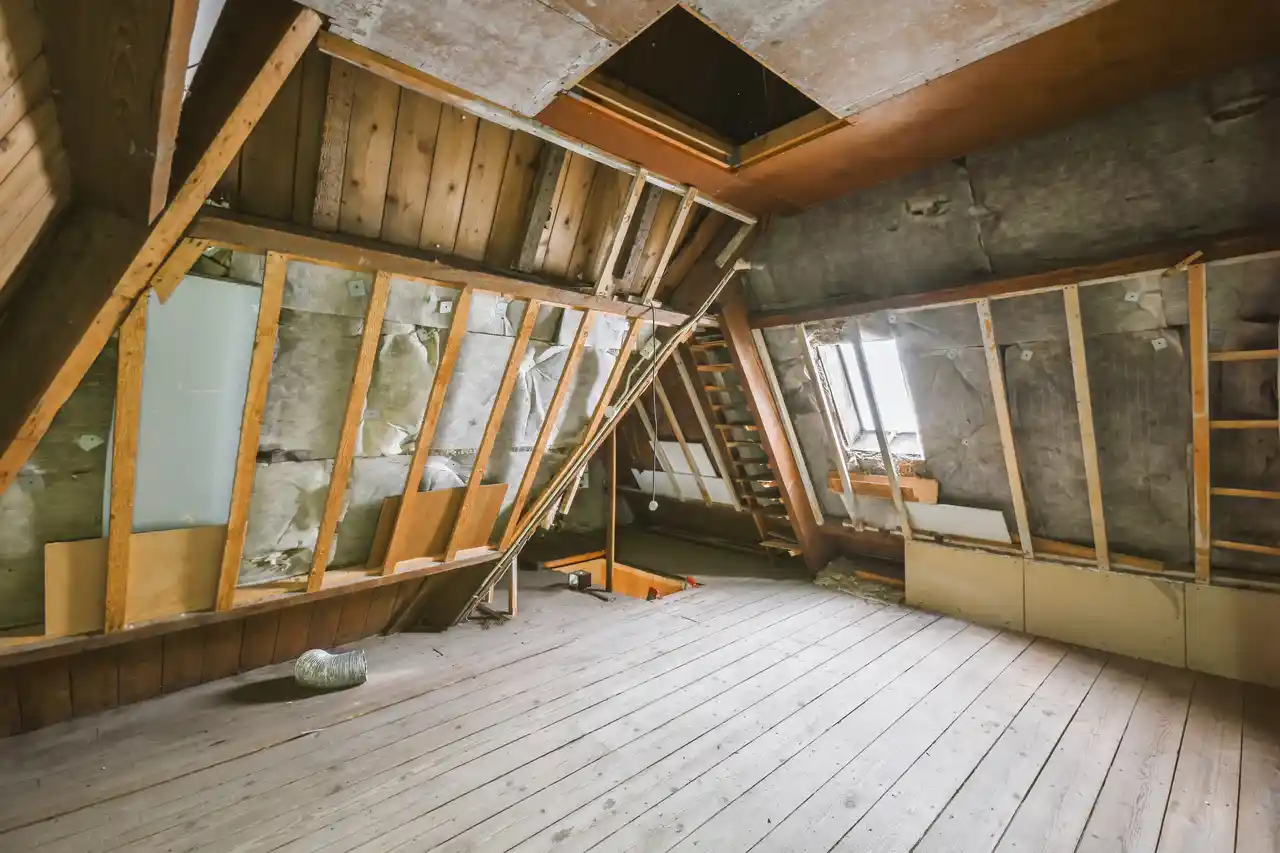
Restore or replace hardwood is one of the most consequential decisions Westchester homeowners face during renovations. Pre-war Scarsdale colonials, Bedford historic farmhouses, and mid-century Chappaqua split-levels often have original hardwood worth saving. Sometimes the floors are beyond restoration and full replacement makes more sense. The right call affects cost, character, and long-term value significantly. Restoration costs typically run a fraction of full replacement. Original hardwood adds character that no new installation can match. Buyers in Westchester specifically value restored original floors during home searches. At the same time, severely damaged hardwood beyond restoration sometimes requires replacement to deliver the visual quality the homeowner wants. Vargas Flooring assesses hardwood condition throughout Scarsdale, Rye, Bronxville, Chappaqua, Bedford, and Armonk every week. This guide explains the restore or replace hardwood decision framework, the condition criteria that drive the right answer, the cost comparison realities, and the long-term value implications for your specific home and floors.
The restore or replace hardwood decision starts with honest condition assessment. Hardwood worth restoring has sound boards with minimal cupping, crowning, or warping. Surface damage including scratches, wear marks, and finish failure doesn’t prevent restoration because sanding removes surface issues. Structural damage prevents restoration. Boards that are cracked through, severely cupped, or moving significantly under foot pressure indicate underlying problems that sanding doesn’t fix. Water damage with stains penetrating deep into the wood sometimes prevents restoration. Surface water staining usually sands out. Deep penetrating water damage that has changed the wood color throughout the board thickness usually doesn’t. Vargas Flooring assesses every restore or replace hardwood project individually. The honest answer covers what each specific floor actually requires rather than generic recommendations that ignore the actual condition.
Hardwood restoration involves sanding through old finish, repairing minor damage, staining if desired, and applying new protective finish. The process takes five to seven days for a typical residential room including cure times between finish coats. Sanding removes the existing finish along with surface damage including scratches, dents, wear paths, and minor water staining. Three sanding passes with progressively finer grits create the smooth surface ready for stain and finish. Damaged boards within the floor sometimes need replacement during restoration. Vargas Flooring sources matching wood for these patch repairs from period-appropriate suppliers when working on pre-war Westchester homes. Stain selection happens during the restoration process. Homeowners can match the original color or update to current preferences. Three coats of polyurethane create the protective finish that lasts 10 to 15 years before refinishing becomes necessary again.
Several conditions tip the restore or replace hardwood decision toward replacement. Structural damage from water, settling, or impact that affects multiple boards typically requires replacement rather than spot repair within restoration. Thin boards that have been refinished multiple times over decades sometimes don’t have enough remaining thickness for another refinishing cycle. Significantly mismatched repairs from previous owners or contractors sometimes look worse after restoration because sanding emphasizes the color and grain differences. Heating system damage from steam pipes, radiator leaks, or HVAC failures can affect hardwood beyond restoration recovery. Mismatched species installed during previous renovations sometimes look worse restored than replaced. The decision depends on what the floor actually delivers after restoration compared to what new installation delivers. The honest assessment during the estimate covers the realistic outcome of each approach.
Cost comparison in restore or replace hardwood favors restoration significantly for sound floors. Restoration costs typically run 30 to 50 percent of full replacement cost for the same room. The labor difference accounts for most of the savings. Restoration involves sanding, staining, and finishing existing wood. Replacement involves removal, substrate work, new material, installation, and finishing. Value implications run more nuanced. Restored original hardwood in pre-war Westchester homes adds appraisal value that new replacement floors often don’t match. Buyers specifically value original hardwood during searches in Scarsdale, Bedford, and Bronxville historic properties. New replacement hardwood adds value but the value of original restored hardwood usually exceeds new replacement in equivalent quality. For sound original floors in pre-war homes, restoration almost always makes financial sense. For damaged floors beyond restoration, replacement protects the value of the rest of the home.
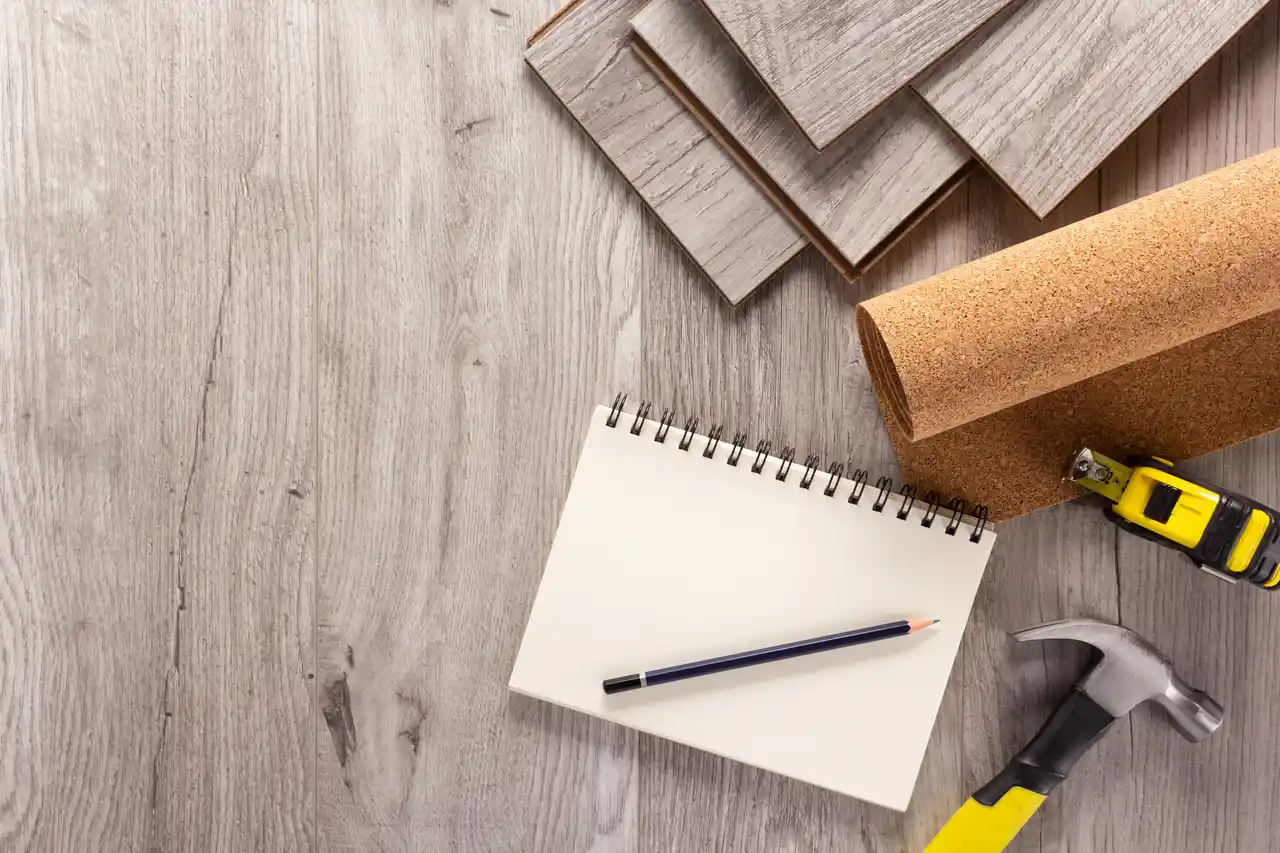
Flooring installation cost New York homes face depends on the material, the size of the project, the substrate condition, and several other factors that affect the total price. Generic cost estimates from national websites don’t reflect the actual reality in Westchester County. Local labor rates, regional material availability, pre-war building conditions, and project scope all drive prices higher than national averages in many cases and sometimes lower in others depending on the specifics. Vargas Flooring provides written estimates throughout Scarsdale, Rye, Bronxville, Chappaqua, Bedford, and Armonk every week. We have real data on what flooring installation actually costs in Westchester homes across hundreds of projects each year. This guide explains the realistic price ranges for each common flooring material, the factors that increase costs in specific situations, the substrate work that affects pricing, and the value calculations that help you make informed decisions about flooring installation cost New York projects in your home.
Material costs vary significantly by quality, brand, and specific product within each flooring category. Solid hardwood runs $5 to $15 per square foot for typical residential grades including red oak and white oak. Premium species including walnut, cherry, and exotic woods run $10 to $25 per square foot. Wide-plank and reclaimed hardwood can exceed $30 per square foot. Engineered hardwood runs slightly less than equivalent solid wood with wear layer thickness affecting price. Tile material costs range from $3 to $20 per square foot depending on whether ceramic, porcelain, or natural stone. Designer tile and large-format porcelain can run higher. LVT material costs run $2 to $7 per square foot for residential grades with commercial-grade LVT running higher. Laminate material costs run $1 to $5 per square foot with AC4 and AC5 commercial grades on the higher end. These ranges represent material only without installation labor or substrate work.
Installation labor in Westchester County runs higher than national averages because of the local cost of living and the prevalence of pre-war and historic homes that require more skilled work. Hardwood installation labor runs $4 to $8 per square foot for standard installations. Custom inlays, borders, or complex patterns add to labor cost. Tile installation labor runs $5 to $10 per square foot for standard installations. Large-format tile, mosaic work, and waterproofing systems add labor cost. LVT and laminate installation runs $2 to $4 per square foot for click-lock floating systems. Glue-down systems add labor. Stair work runs separately from main flooring and typically prices per step rather than per square foot. The labor cost for stair installation runs $40 to $80 per step depending on complexity and material. Westchester labor reflects the actual market rather than discounted pricing that some out-of-area contractors quote initially.
Substrate preparation often adds significant cost to flooring installation cost New York projects, especially in pre-war Westchester homes. Plywood overlay for uneven subfloors runs $2 to $4 per square foot. Self-leveling compound for concentrated dips and rises runs $3 to $6 per square foot. Full subfloor replacement runs $5 to $10 per square foot. Joist sistering or structural repairs add cost depending on access and scope. Asbestos floor tile abatement runs $5 to $15 per square foot depending on the abatement company and the specific situation. The work is mandatory in pre-war buildings where asbestos exists. Moisture mitigation for basement and slab installations runs $2 to $5 per square foot. These substrate costs are sometimes hidden in initial quotes from contractors who don’t disclose them upfront. The honest approach covers what your specific project actually requires.
Total flooring installation cost New York projects range from $8 to $35+ per square foot installed depending on material, labor, and substrate work. Mid-range LVT or laminate installations run $5 to $12 per square foot total. Mid-range hardwood installations run $10 to $20 per square foot total. Mid-range tile installations run $12 to $25 per square foot total. Premium installations with custom features, complex substrates, or historic restoration work can run significantly higher. Long-term value calculations favor quality installations over budget shortcuts. Cheap flooring installation in Westchester typically fails within five to ten years and requires full replacement. Quality installation that addresses substrate properly, uses appropriate materials, and follows correct techniques lasts 20 to 50+ years depending on material. The cost-per-year math favors quality work significantly. For Westchester homes where flooring affects resale value, the quality difference matters even more.
(845) 332-1229
(845) 332-1229
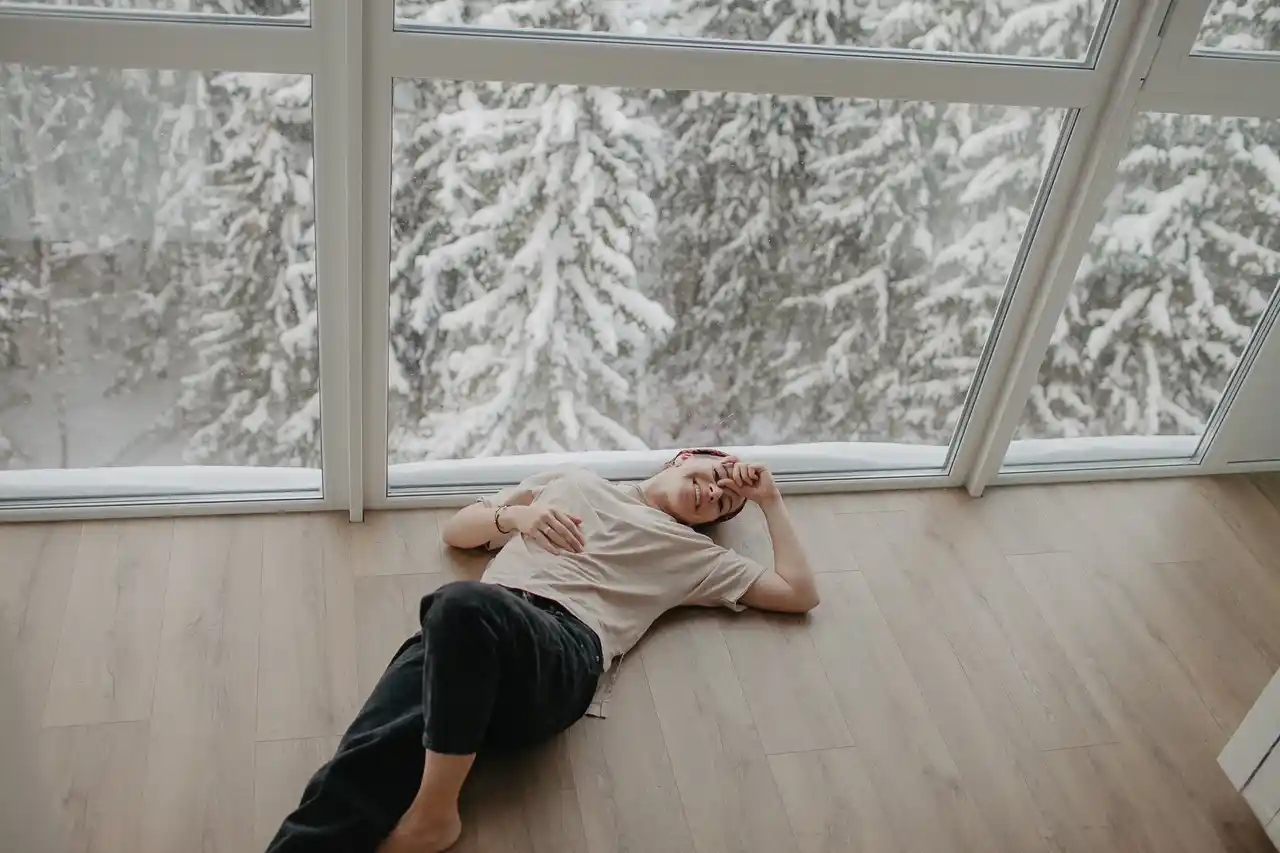
Best time to install flooring New York homes face depends on the material, the room conditions, and what you want to optimize. Some flooring types install best in specific seasons. Others install well year-round with proper conditioning. Cost considerations sometimes favor off-peak scheduling. Convenience considerations sometimes favor peak season despite higher prices. Vargas Flooring installs flooring throughout Westchester County all twelve months of the year. We have real data on how each season affects installation quality, project timelines, and long-term floor performance. Winter installations face different challenges than summer installations. Spring and fall offer some advantages and some disadvantages compared to peak summer scheduling. This guide explains the seasonal realities for best time to install flooring New York projects, the material-specific considerations, the cost and scheduling trade-offs, and the practical advice that helps you choose the right time for your specific home and flooring project.
Winter installation has real advantages for Westchester flooring projects. Contractor availability runs higher during winter because demand decreases. Project timelines run shorter because schedules are less crowded. Pricing sometimes runs lower because contractors offer winter discounts to stay busy. The downsides matter too. Cold temperatures slow adhesive cure rates and affect tile thinset performance. Heating systems running constantly drop indoor humidity significantly, which affects hardwood acclimation timing. Snow and ice make material delivery and worksite access more difficult in some weeks. Vargas Flooring schedules winter installations with attention to these factors. Heated work spaces, adjusted product selection, and extended acclimation timing all happen during winter projects. The work proceeds correctly through cold weather when planning accounts for the realities rather than ignoring them.
Spring and fall offer some advantages over both summer and winter for flooring installation in Westchester. Temperature ranges run moderate in both seasons, which favors adhesive cure rates and product acclimation. Indoor humidity in homes stabilizes between the dry winter and humid summer extremes, which makes hardwood acclimation more predictable. Contractor availability runs moderate in both seasons compared to peak summer. Project costs sometimes run between winter discounts and summer peak pricing. The downside for spring is that some homes have lingering moisture from winter snow melt that affects basement and slab conditions. Fall installations sometimes hit weather windows where rain delays material delivery. Spring and fall work well for most flooring types when scheduled correctly. The transition season conditions favor hardwood specifically because of the moderate humidity that matches typical operating conditions for Westchester homes.
Summer is the peak season for flooring installation in Westchester County. Demand runs highest, schedules fill quickly, and pricing reflects peak season rates. Air conditioning running constantly stabilizes indoor humidity at lower levels than the outdoor summer humidity. The conditioned indoor environment works well for hardwood acclimation and installation. Tile installations cure quickly in warm temperatures. LVT and laminate install well in any temperature but the warm summer weather makes installation comfortable for crews. The downsides include longer project timelines because of contractor scheduling demands, higher costs from peak pricing, and sometimes longer waits for material delivery from suppliers handling peak season demand. Summer works well for installation quality when projects can be scheduled early. Last-minute summer projects sometimes can’t fit contractor schedules until fall.
Material-specific recommendations refine the best time to install flooring New York advice. Hardwood installations work best in spring or fall when humidity matches the home’s average operating conditions. Hardwood installed in winter humidity acclimates differently than hardwood installed in summer humidity, which affects long-term performance. Tile installations work in any season with proper temperature control during installation. Bathroom tile work specifically benefits from warm weather that helps grout cure properly. LVT and laminate work in any season because both materials install over conditioned indoor environments without significant temperature sensitivity. Outdoor work, including substrate prep that requires open windows or doors, favors moderate temperatures of spring and fall over winter cold or summer humidity. The right time for best time to install flooring New York depends on your specific material choice and your scheduling flexibility for the project.
Winter flooring installation in Westchester County has real advantages and real challenges that homeowners should understand before scheduling cold-weather projects. Contractors have more availability during winter because peak summer demand subsides. Project timelines run shorter. Sometimes pricing favors winter scheduling. At the same time, cold temperatures, dry indoor air, and weather-related logistics all affect winter installation projects in ways that don’t happen during warmer months. Vargas Flooring installs flooring during winter throughout Scarsdale, Rye, Bronxville, Chappaqua, Bedford, and Armonk every year. We see the actual outcomes of winter projects and understand what makes them succeed compared to projects that face problems from cold-weather complications. This guide explains the winter flooring installation realities, the material-specific considerations for cold weather, the scheduling and pricing implications, and the practical advice for homeowners considering winter projects rather than waiting for spring or summer scheduling.
Cold temperatures affect winter flooring installation in several ways that warm-weather work doesn’t face. Adhesive cure rates depend on temperature significantly. Tile thinset, LVT glue-down adhesives, and hardwood adhesives all cure slower in cold temperatures. Manufacturer specifications require minimum temperatures during application and cure periods, which means cold work spaces need heating before adhesive work happens. Indoor humidity drops significantly during winter heating season. Most Westchester homes run 25 to 35 percent indoor humidity during winter compared to 45 to 55 percent during summer. Hardwood acclimation has to match the room’s actual operating humidity. Hardwood installed during dry winter conditions sometimes shows gaps when summer humidity rises. The acclimation timing has to account for the seasonal differences rather than treating winter installation the same as summer installation.
Winter flooring installation has real advantages that make cold-weather scheduling worthwhile for many Westchester homeowners. Contractor schedules run lighter because demand drops after the holiday season. Projects can typically start within two to four weeks of the estimate rather than the eight to twelve week wait that happens during summer peak season. Project timelines themselves run shorter because crews aren’t dividing time between multiple concurrent projects. Pricing sometimes favors winter installation. Some contractors offer winter discounts to maintain crew utilization during slow weeks. Material delivery runs faster because suppliers face less demand. These advantages add up to potential cost savings and faster completion compared to summer scheduling. For homeowners who can plan winter projects with proper heating and humidity control, the practical advantages often outweigh the complications of cold-weather work.
Material-specific considerations for winter flooring installation vary significantly by product type. Hardwood requires extended acclimation during winter to account for the dry indoor humidity. Five-day acclimation that works in summer often runs seven to ten days during winter. The wood needs to stabilize at the actual winter operating humidity before installation. Tile installation needs heated work spaces during thinset application and cure periods. Cold tile installation creates bond failures that cause tiles to lift within months. LVT and laminate install well in any temperature because click-lock floating systems don’t depend on adhesive cure. The materials still need acclimation in the conditioned space before installation begins. Carpet installations work well in winter because the material itself isn’t sensitive to temperature. Each material has specific cold-weather requirements that affect timing and method.
Successful winter flooring installation depends on planning that accounts for cold-weather realities. Schedule the estimate visit early so the project can start when conditions allow. Confirm HVAC systems are operating properly before installation begins. Winter projects fail when heat goes out during installation. Plan for slightly longer project timelines than summer equivalents because cure times run slower in cold conditions. Account for snow and weather delays that sometimes affect material delivery or worksite access. Communicate with the contractor about your specific timing flexibility. Some winter projects work better mid-winter when temperatures stay stable than early winter when freeze-thaw cycles disrupt the work. Vargas Flooring handles these planning details as part of every winter project in Westchester. The honest approach covers what cold-weather installation actually requires rather than treating winter projects identically to summer scheduling that doesn’t apply during cold months.
(845) 332-1229

(845) 332-1229
Spring flooring renovation projects are popular in Westchester County because the timing aligns with home improvement season and the weather supports installation work that struggled through winter. Many homeowners plan flooring renovations to complete before summer entertaining season or family events. Others use spring renovations to address damage that became visible after winter heating dried out indoor air. The planning process matters because spring is one of the busier seasons for flooring contractors. Late planning means longer waits for installation. Early planning means project timing options and contractor availability. Vargas Flooring schedules spring flooring renovation projects throughout Scarsdale, Rye, Bronxville, Chappaqua, Bedford, and Armonk starting with February and March estimates for spring installations. This guide explains spring flooring renovation planning, the material recommendations for spring work, the timing considerations for getting on contractor schedules, and the practical advice for completing renovation projects before summer arrives.
Spring flooring renovation popularity has several practical reasons. Winter heating reveals problems that mild weather hides. Hardwood gaps, subfloor squeaks, and tile cracks all become more obvious during dry winter conditions. Homeowners notice the issues and plan renovations to address them before warm weather. Weather conditions support spring installation work. Moderate temperatures favor adhesive cure rates. Indoor humidity stabilizes between dry winter and humid summer extremes, which makes hardwood acclimation predictable. Snow and ice issues that affected winter material delivery clear up. Tax refunds arrive during spring, providing funding for renovation projects that homeowners had planned. Real estate season heats up during spring, with homeowners planning sales completing renovations to maximize value. These factors combine to make spring one of the busiest seasons for flooring contractors. The popularity drives the need for early planning to secure contractor availability.
Successful spring flooring renovation projects start planning early. The diagnostic visit and estimate should happen in February or March for installations during April, May, or June. Contractor schedules during peak spring season fill weeks ahead. Late planning means waiting until summer or fall for installation. Material selection happens during the estimate process. Specialty hardwood, custom tile, and large-format porcelain sometimes have lead times of two to four weeks for ordering. Spring projects need material ordering during the planning phase to support installation timing. Substrate work assessment also happens during the estimate. Pre-war homes with substrate issues need planning for the additional work timing. Spring flooring renovation projects involving multiple rooms or whole-house scope sometimes need eight to twelve weeks from estimate to completion. Single-room projects sometimes complete in three to four weeks. The timeline depends on project scope and contractor scheduling.
Spring flooring renovation works well for all flooring materials but specific products perform particularly well in spring installation conditions. Hardwood installations benefit from spring conditions because the moderate humidity matches typical operating conditions for Westchester homes. Acclimation happens predictably. Long-term performance favors spring-installed hardwood over winter or peak summer installations. Tile installations work well in spring because temperatures support proper thinset cure without the rush that summer projects sometimes face. Bathroom tile renovations specifically benefit from spring scheduling because of the careful waterproofing work that takes time. LVT and laminate install well in any season but spring conditions make the work comfortable for crews and predictable for cure times. Specialty installations including stair remodels, custom medallions, or historic restoration also favor spring scheduling because crews have more time to focus on detail work compared to peak summer demands.
Successful spring flooring renovation projects depend on early planning, clear communication with contractors, and realistic timeline expectations. Schedule the estimate visit early to lock in contractor availability for installation during the desired window. Communicate any deadlines tied to family events, real estate sales, or other commitments so the project timeline aligns with the requirements. Confirm material selections early so ordering happens with adequate lead time. Substrate work assessment during the estimate prevents surprises during installation. Pre-war Westchester homes specifically benefit from substrate evaluation during planning because the work often extends project timelines. Coordinate with other contractors if the flooring project is part of larger renovations. Sometimes flooring installation needs to happen after other work completes. Sometimes flooring goes first with protection during subsequent renovation phases. Vargas Flooring coordinates these schedules as part of spring renovation projects throughout Westchester County.
“Send us your information and we will contact you.”
One room, the whole house, or a commercial space. Twenty years of installs, a written estimate before we start, and a clean job site every day. Send us the details.
(845) 332-1229
vargasflooring92@gmail.com
Licensed & Insured